Nu-Link2-Pro
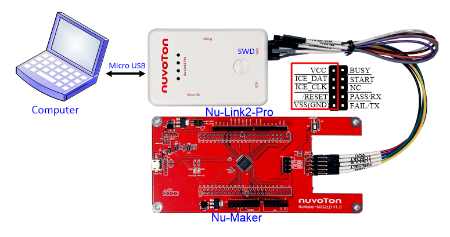
| 1. | Download and install Nuvoton NuMicro ICP Programming Tool, and connect as shown in the figure below | |
|
|
||
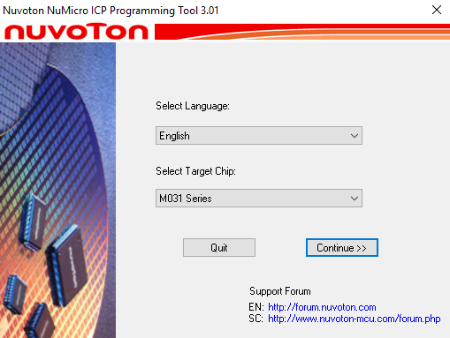
| 2. | Open the ICP Tool, specify the UI language and target chip, and then click Continue, as shown in Figure 7. | |
|
Figure 7 Startup Screen of ICP Tool |
||
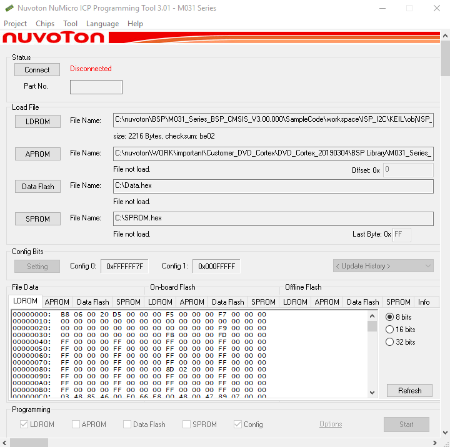
| 3. | In the ICP Tool window, the connection status is shown as “Disconnected” since the ICP tool has not been connected with the Nu-Link2-Pro, as shown in Figure 8. | |
|
Figure 8 ICP Tool Main Window |
||
| 4. | Then click the Connect button. Go to (5) if more than two Nu-Link2-Pro are connected with the host. Go to (6) if only one Nu-Link2-Pro is connected with the host. | |
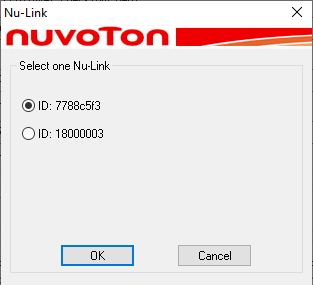
| 5. | If two Nu-Link Adapters have been connected with the computer, a message appears and asks to select one from the two adapters. Clicking OK will connect the selected adapter with the host, as shown in Figure 9. When a Nu-Link2-Pro is selected for connection, the Status LED starts blinking. | |
|
Figure 9 Select One Nu-Link2-Pro |
||
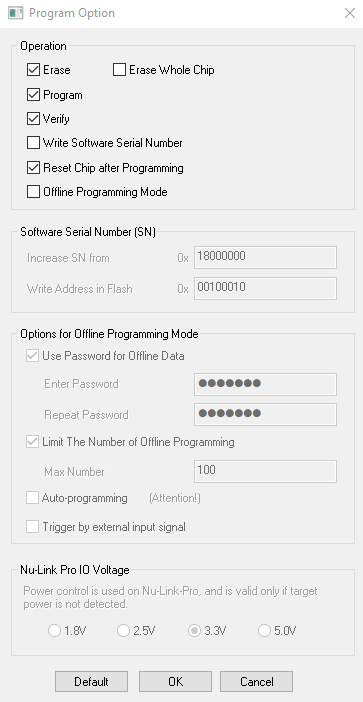
| 6. | Click Option in the Programming section of the ICP Tool Window to open the Program Option form, as shown in Figure 10. | |
| 7. | In the Nu-Link2-Pro IO Voltage, specify the power voltage of the SWD port for the target chip, and then click OK. To use the offline programming function, the Offline Programming mode option needs to be selected, as shown in Figure 10. | |
|
Figure 10 ICP Tool Programming Options |
||
| 8. | After the Connect button is clicked, the ICP Tool will be connected with the Nu-Link2-Pro, and a SWD port will be detected. Figure 11 shows that the ICP Tool has been connected with the Nu-Link2-Pro and a target chip is detected. At this time, the user can start programming the target chip. Also user can use the offline programming to save the offline programming information in the Nu-Link2-Pro. | |
|
Figure 11 Nu-Link2-Pro Connected with a Target Chip Detected |
||
| 9. | Figure 12 shows that the ICP Tool has been connected with the Nu-Link2-Pro with no target chip detected. The ICP tool will continue detecting the target chip until the Stop Check button is clicked. At this time, the user cannot program any chip. | |
|
Figure 12 Nu-Link2-Pro Connected with No Target Chip Detected |
||
| 10. | Click the Disconnect button if programming is not needed (as shown in Figure 11). Or click the Stop Check button to disconnect the ICP Tool with the Nu-Link2-Pro and leave the Nu-Link2-Pro unused (as shown in Figure 12). As such, the Nu-Link2-Pro can be connected with another tool. | |
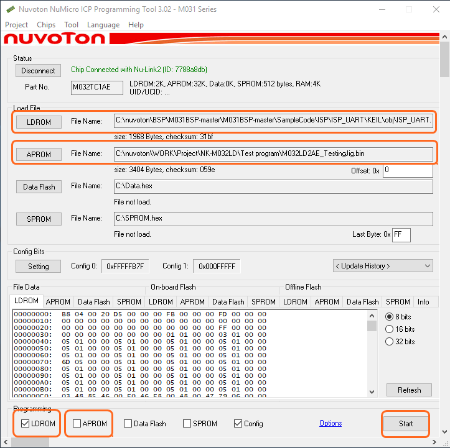
| 11. | Select the .bin file you want to program APROM and LDROM, and tick the memory location, as shown in Figure 13. | |
| 12. | Click the Start button to start programming. | |
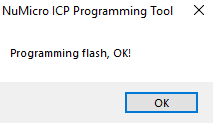
| 13. | Click the OK button in the programming completion window to complete the operation, as shown in Figure 14. | |
|
Figure 13 Programming File Selection Window
Figure 14 Programming Completion Window |
||
